
ESE101: Switching from Assembly to C Part 2
This week we’ll update Code Composer Studio and then dive into running C code on the MSP430.
I’ll explain more about C in a future post, but for now we’ll let TI’s Code Composer Studio generate the C code for us.
(If you can’t wait to learn about C then Andrei has a great series about C starting here. You can see his entire Embedded Wednesday series here.)
Installing a New Development Environment
Normally I follow a rule with development environments and tools: if it ain’t broke, don’t fix it.
I’m going to break that rule today. Why?
I got a new laptop recently, and needed to install TI’s Code Composer Studio (CCS) to play with my MSP430 and write this post. I was going to simply use the version we had been using, CCS 6, but I noticed that TI made a major update to CCS 7. It looks like CCS 7 is completely free, whereas CCS 6 had some parts that required a paid license. We didn’t use any of the paid features in ESE101, but that seems like a good enough reason to switch. Plus CCS 7 adds a few other features and bug fixes.
The one downside to CCS 7 is that it drops support for Windows XP. If any readers are using Windows XP then please let me know. Worst case I think you can probably continue using CCS 6 because version 7 looks very similar.
How to install the CCS 7: (actually version 7.1.0 at this writing)
1. Download the “Off-line Installer” for your OS. I tried using the web installer for macOS twice, but each time it seemed to hang while installing. The “off-line” installer worked perfectly.
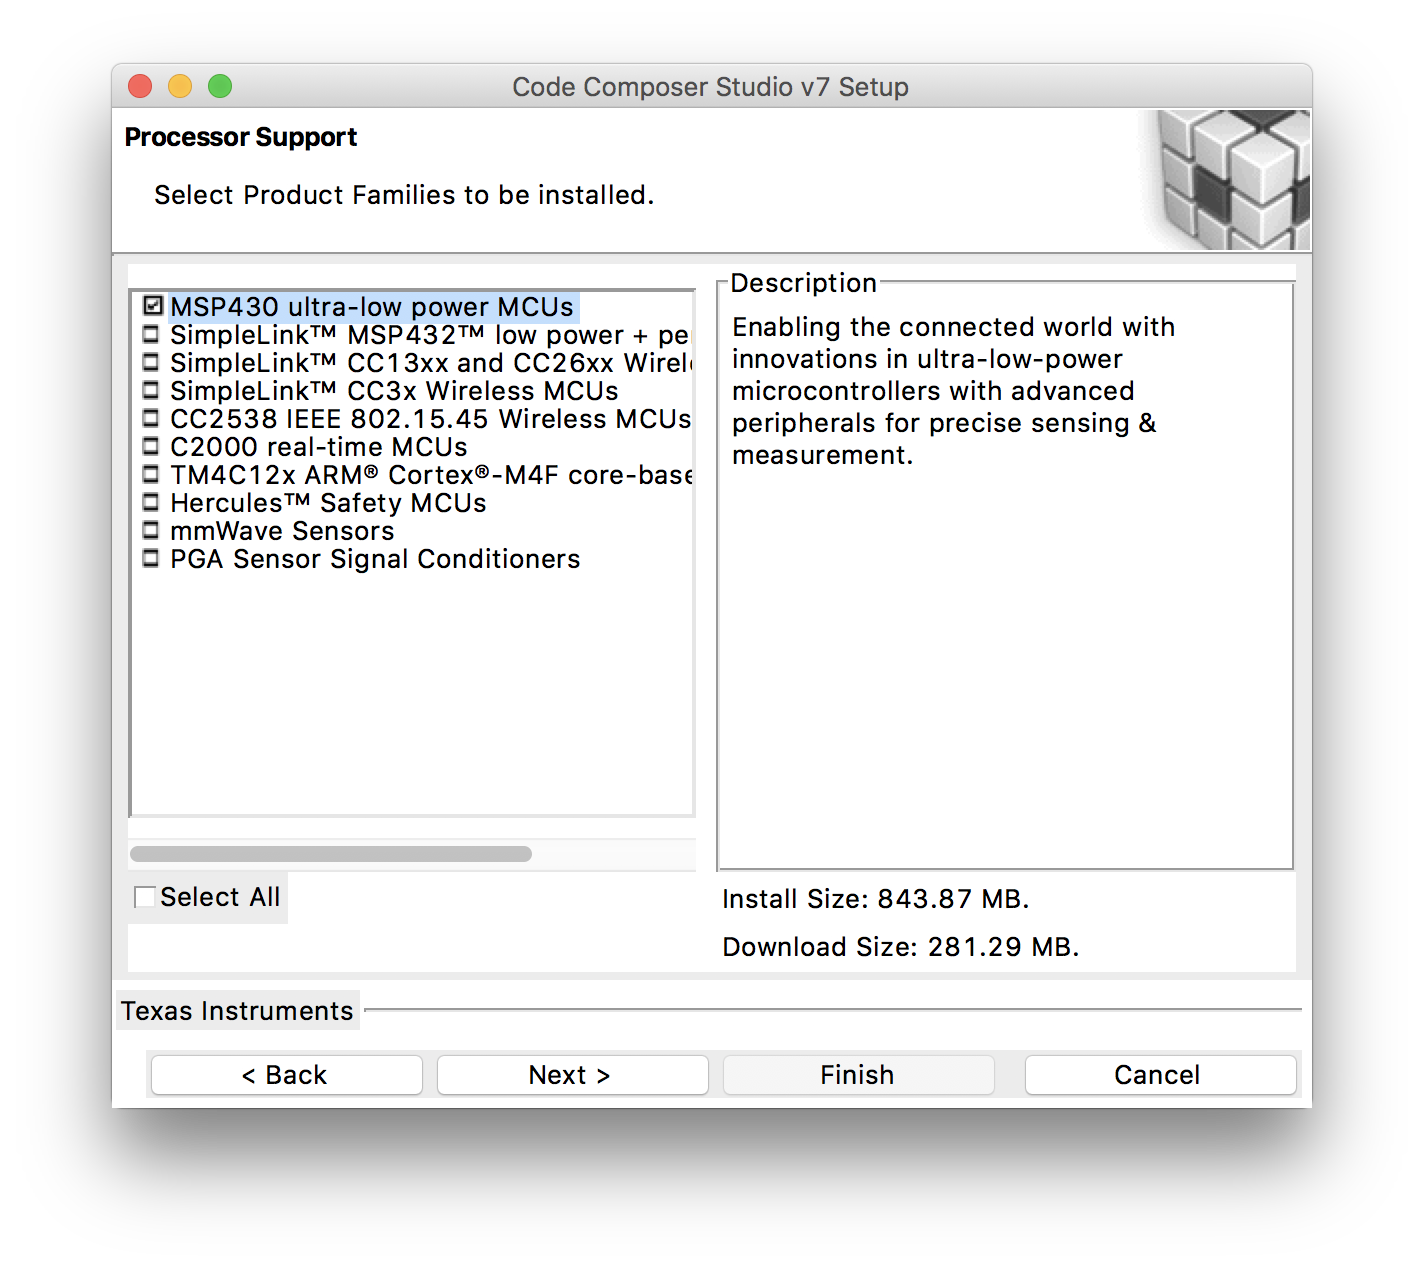
2. Start the installation process and make sure to select the MSP430 product family like this:
3. Click through the rest of installation steps for CCS 7.
4. Once it’s done, launch CCS 7 and it should automatically check for updates, which it will probably need. Install those updates and restart CCS7.
Make the Machine Write Code for You
Instead of writing C code ourselves, let’s use some example code that TI ships with CCS. We used this same example code before when we first started using CCS. Let’s do it again to make sure our new installation of CCS works.
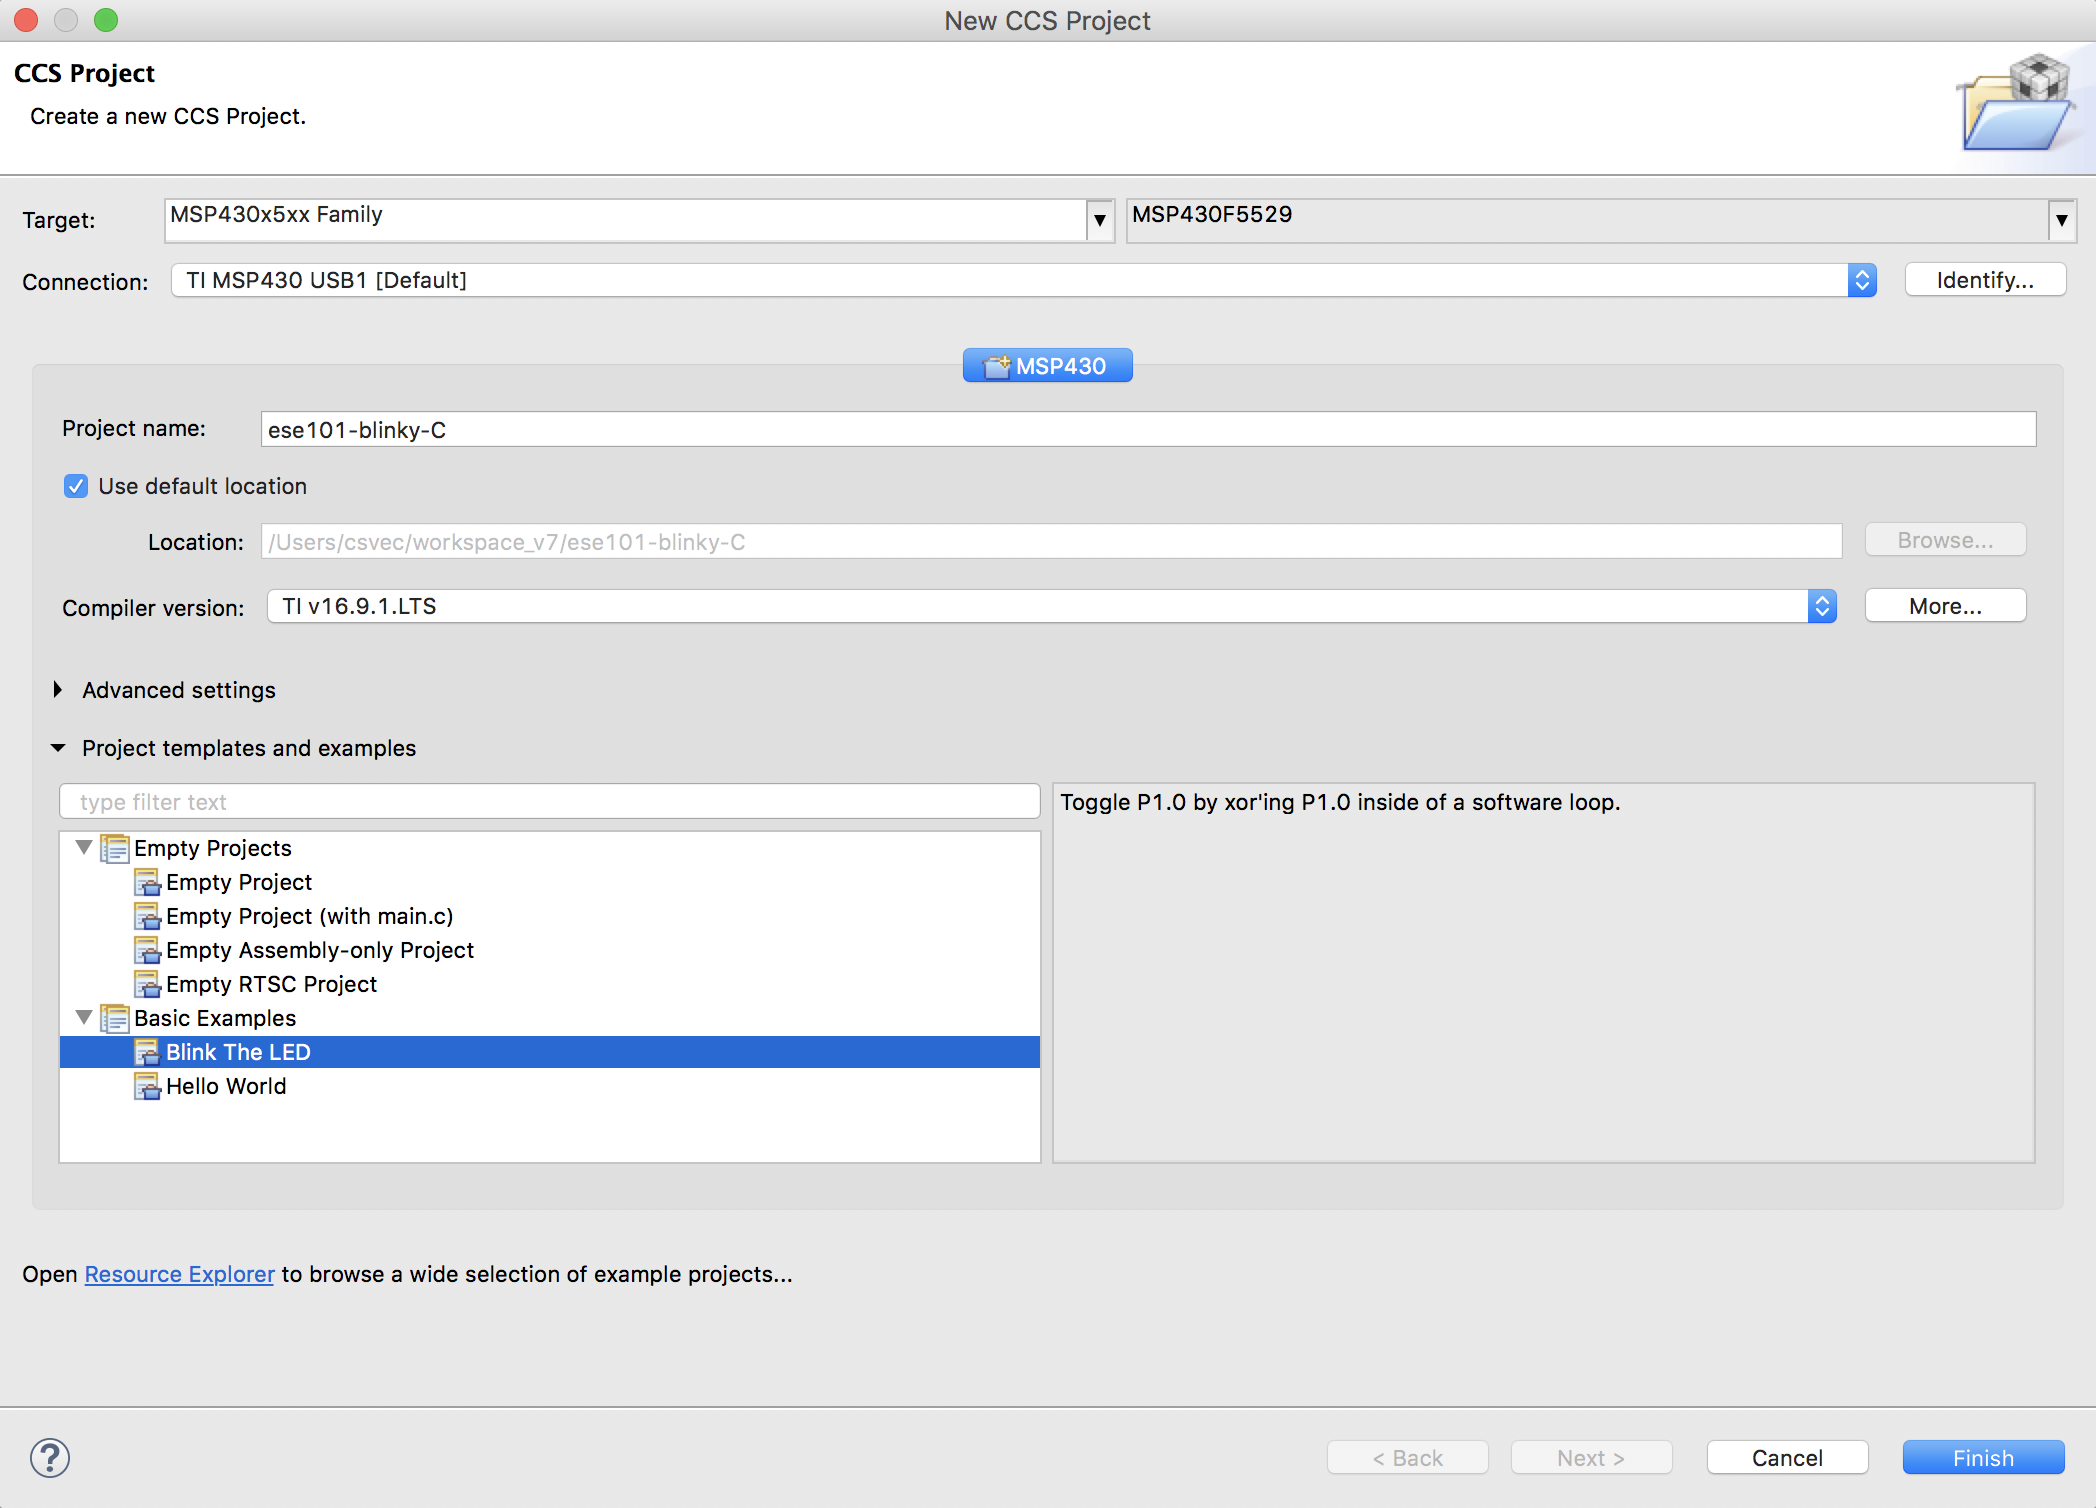
1. Select “New Project”.
2. In the form window that pops up, enter:
- Target: MSP430x5xx Family
- And to the right of that select: MSP430F5529
- Project name: whatever you like, I called mine “ese101-blinky-C”
- Under “Project templates and examples” choose “Blink The LED”.
- Leave everything else as-is.
The form should look like this when you’re done:
After you click Finish you should see something like this:

Now to actually run the C code!
1. Plug your MSP430 board into your computer.
2. In CCS, select Run->Debug, or click the picture of the little bug in the toolbar.
3. A window talking about power/energy measurement may pop up. (It popped up the second time I ran through these instructions, not the first.)
- Check “Do not show this message again” and then select Proceed.
4. CCS will download the code to your MSP430 board.
5. Select Run->Resume and the code will start running on your MSP430 board.
6. The red LED marked P1.0 should start blinking a few times a second.
Voilà! You’re running C code!
You can pause the code (Run->Suspend) and single step (Run->Step Over) through it exactly as we did with assembly code previously in ESE101.
Try changing the value of the variable ‘i = 10000’ to 30000, recompile the code (Project->Build Project or click the little hammer icon), select “Yes” when CCS asks if you want to reload the newly built file to the MSP430 board, then let the program run with Run->Resume (or click the play/pause button).
What happens? Does the LED blink faster or slower? Why?
If you need a reminder please go back to the first ESE101 post where we used CCS - it goes into detail about what that ‘i = 10000’ variable is used for. That post also explains how to set and use breakpoints in CCS, which is the same in CCS 6 and 7. (CCS 6 and 7 work identically for me for everything I’ve tried so far.)
Next time we’ll step through the C code and explain what it’s doing in detail.
This post is part of a series. Check out the complete Embedded Software Engineering 101 series here.