
ESE101: MSP430 Development Environment Setup
Last week we started a three-post detour into the specifics of the TI MSP430 hardware and software development environments. If you’re not following along with the MSP430 LaunchPad we’re using for ESE101, hang in there - I’ll get back to more general microcontrollers and embedded software engineering soon!
TI has plenty of tutorials and videos that discuss the hardware and software bring up that I’ll cover here (last week and the next two weeks), but I want ESE101 to be a one stop shop, and I don’t want those of you using the hardware along with me to have to wade through TI’s (sometimes out of date) tutorials and videos.
Today, I’ll tell you about the various development environments for the MSP430 and install the one we’ll be using.
Choosing a development environment for a microcontroller is easier than choosing a microcontroller itself, if only because there are far fewer options.
Texas Instruments (aka TI), the maker of the MSP430, offers three of their own environments to develop software for the MSP430 LaunchPad dev kits. They’re all free. The three TI-supplied development environments are:
1. Energia
The Energia IDE (Integrated Development Environment) is basically an Arduino clone. It comes with a simple code editor, serial monitor, and a bunch of examples for TI’s dev kits. If you’ve used Arduino’s IDE then Energia should look familiar.
2. Code Composer Studio
Code Composer Studio (aka CCS) is an Eclipse-based full-featured traditional development environment including an editor and debugger. It gives you full access to the hardware, including register and memory access.
It’s also referred to as “CCS Desktop” in some TI documentation.
3. CCS Cloud
CCS Cloud is a browser-based version of Code Composer Studio. It’s a middle ground between the simple and easy to use Energia and the complex and feature-rich CCS.
What’ll it be?
I chose Code Composer Studio for ESE101 because it gives us the the most control and visibility into what the microcontroller is doing. Debugging features like direct register and memory access were the main features that made me choose CCS over CCS Cloud.
CCS is available for Windows and Linux, and it’s available in beta for Mac. I’ve been using the Mac beta and it works well enough for me.
Installing CCS
Installing CCS is a somewhat annoying process, but bear with me here and we’ll get through it together.
If you use a Windows or Linux machine download the latest version from here.
If you use Mac OS X 10.9 or later download the beta from here. As of this writing (April 14, 2016) the latest beta is “beta 3”, which works well on my Mac running OS X 10.11.4.
You’ll have to register and fill out some online forms to download any of the versions. It’s not exactly streamlined, but it’s the norm when getting software from chip companies. Plus, there are some export restrictions that apparently require TI to ask you some questions about citizenship before allowing you to download CCS.
If you’re using Windows or Linux you’ll get slightly different options throughout the installation process, but the options we’ll use should be there on all platforms. If not, please leave a comment below. If you have a choice, I recommend using Windows for installing CCS. Embedded development software is usually developed for Windows first and the Windows versions tend to be better supported. (That being said, I’m using a Mac and it works well enough for me.)
Also, if you’re asked to allow network access or firewall permissions to different programs as CCS installs, please agree to them - CCS updates itself from within the app so it needs network access.
When you install CCS it will ask you which components you want to install. Select “TI MSP430 Compiler” and “MSP430 Ultra Low Power MCUs”. When you select “MSP430 Ultra Low Power MCUs” on the Mac you might see a warning about “known issues with debugging MSP430 devices on El Capitan” (that’s OS X version 10.11):

I’m running El Capitan and haven’t seen any issues with debugging without having to disconnect/reconnect the USB cable.
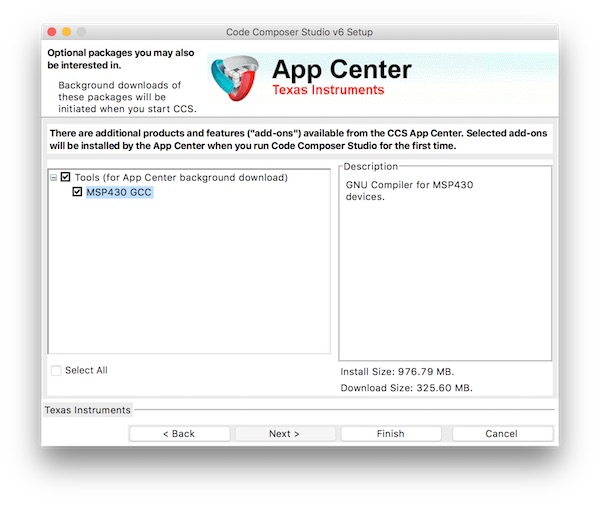
A couple screens later you should also select “MSP430 GCC”:
After CCS is installed, start the application for the first time. It will ask you where to save project files, choose any location you like:
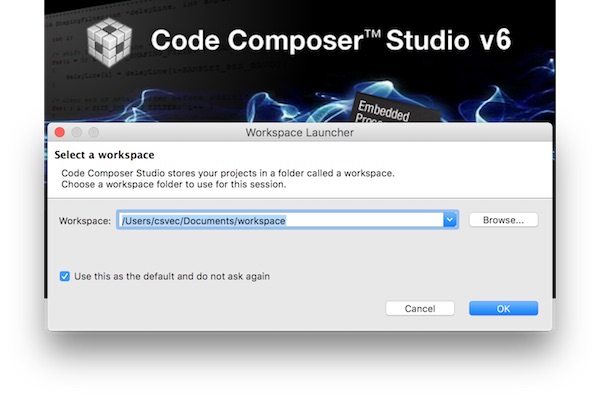
I prefer to check the box for “Use this as the default and do not ask again”. (You can change the workspace location later if you change your mind.)
Next CCS will ask you if you want to download additional add-ons that you selected during installation: in our case this should be the MSP430 GCC compiler - say yes:

It will download the GCC compiler, then it needs to restart CCS.
When CCS restarts you’ll see a message about updates on the bottom right part of the window:
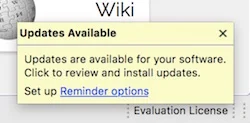
Click the “review and install updates” text and get all the updates it offers. CCS will want to restart after installing the updates, say yes to that.
Finally we’re done installing CCS! It should look like this:

Believe it or not, that was actually easier than setting up most other embedded development environments.
Next week we’ll load our first code onto the MSP430 LaunchPad hardware, and the following week we’ll get back to learning about microcontrollers.
This post is part of a series. Check out the complete Embedded Software Engineering 101 series here.